Ever found yourself wrestling with the complexities of connecting your IoT devices, only to be thwarted by a stubborn firewall? Understanding how to use remote IoT behind a firewall on a Mac isnt just a technical challenge; it's a crucial step towards ensuring secure and compliant connectivity in today's increasingly interconnected world.
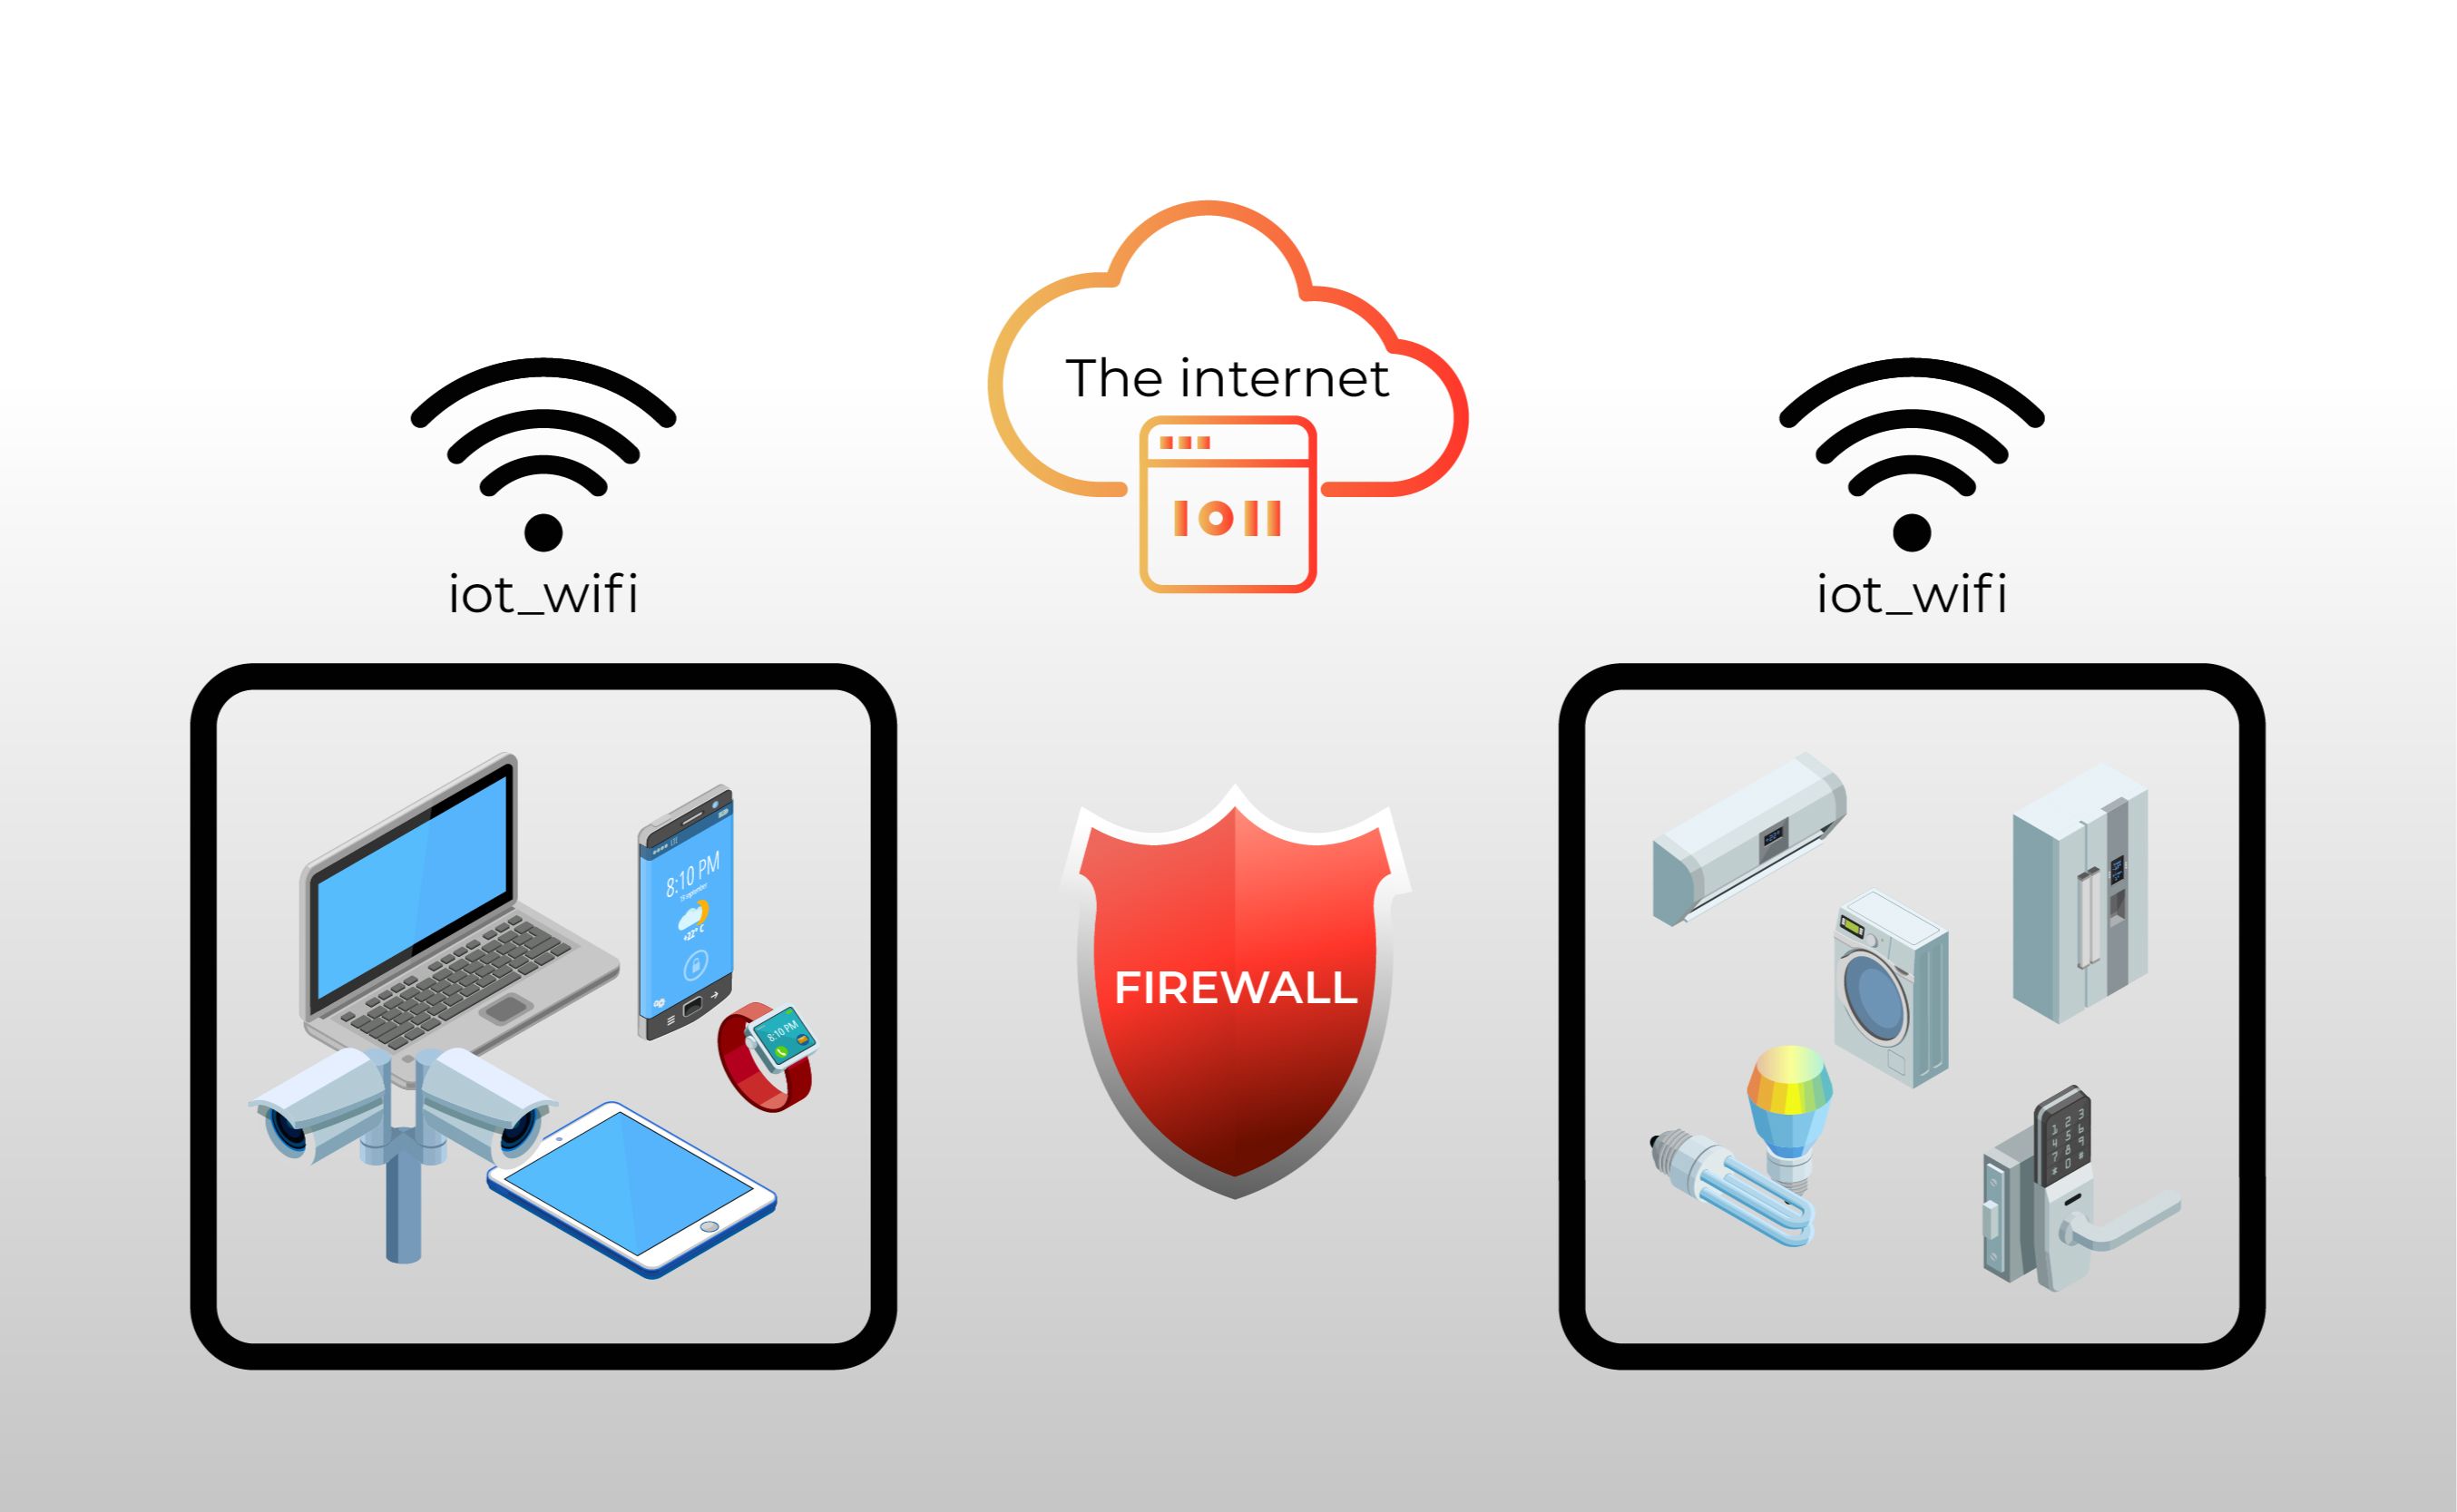
In today's digital landscape, the convergence of the Internet of Things (IoT) and the need for robust security protocols has become paramount. Businesses, organizations, and even individual users are increasingly relying on IoT devices for a myriad of applications, from smart home automation to industrial process control. However, the very nature of these devices their remote accessibility introduces significant security vulnerabilities. This is where firewalls come in. Firewalls act as digital gatekeepers, meticulously controlling the flow of network traffic to protect sensitive data and prevent unauthorized access. But how do you balance the need for security with the desire for seamless connectivity? How do you ensure your IoT devices remain accessible, manageable, and secure when they're tucked behind the protective embrace of a firewall?
This is where this guide comes in. We are going to take a deep dive into the world of remote IoT connectivity, particularly focusing on setting up and managing it behind a firewall using a Mac server. We'll unpack the technical intricacies and explore the practical steps needed to establish a secure and efficient system. We will also talk about overcoming potential hurdles and ensure your devices are protected from unauthorized access. By the end of this journey, you'll have a comprehensive understanding of remote IoT, its functionalities, and how to configure it securely on your Mac, even when behind a restrictive firewall. Managing remote IoT devices behind a firewall using a Mac server is undoubtedly a complex undertaking, but it is also an achievable one.
Let's break down the concepts with the help of an example. Imagine you have a smart home system, including smart lights, security cameras, and a thermostat, all connected via the internet. Now, imagine that you want to manage these devices remotely, perhaps from your office or while you're on vacation. Without proper configuration, your firewall might block the communication between your devices and your control center, rendering your system inaccessible. But, if you follow this guide, you'll know how to avoid these pitfalls. It's like learning the secret handshake that gets you into the exclusive party.
This journey will be divided into several key sections: understanding the fundamentals of remote IoT and firewalls, setting up your Mac server for remote access, configuring your firewall to allow the required traffic, and ensuring overall security. We will also touch upon some additional tips and tricks to optimize performance and troubleshoot potential issues. Remember, security is not a one-time setup, but a continuous process of monitoring and adaptation. By following the steps outlined in this guide, you can not only configure your setup effectively but also maintain optimal security, ensuring that your IoT devices remain accessible, controllable, and protected.
Before we delve into the technical details, let's get a firm grasp on the basic terminologies. The term remote IoT refers to the capability of remotely accessing and controlling IoT devices from a location different from the device itself. Firewall is a network security system that monitors and controls incoming and outgoing network traffic based on predetermined security rules. It acts as a barrier between a trusted internal network and an untrusted external network, such as the internet. Understanding these basic terminologies is crucial for a smooth setup.
Let us examine a list of commonly used terms:
- IoT Devices: These are the physical devices, such as sensors, cameras, or smart appliances, that collect and transmit data.
- Mac Server: This is a Mac computer that is configured to manage remote connections and traffic.
- Firewall: A security system that monitors and controls network traffic.
- Ports: Virtual endpoints used for network communication, such as HTTP (port 80) or SSH (port 22).
- Remote Access: The capability to access and control devices from a remote location.
- NAT Router: A device that translates private network addresses to public IP addresses.
- Web Application: A software application that can be accessed over the internet using a web browser.
Having established the basics, lets delve into the technical aspects of setting up remote IoT behind a firewall using a Mac server. The following are the key steps:
Step 1: Preparing Your Mac Server
First, your Mac server must be properly set up to handle remote connections. You will likely need to enable remote management features in your macOS settings. Here's how:
- Open System Preferences (or System Settings in newer macOS versions).
- Click on "Sharing."
- Enable "Remote Management" (or "Screen Sharing").
- Configure the settings as needed, such as allowing access for specific users.
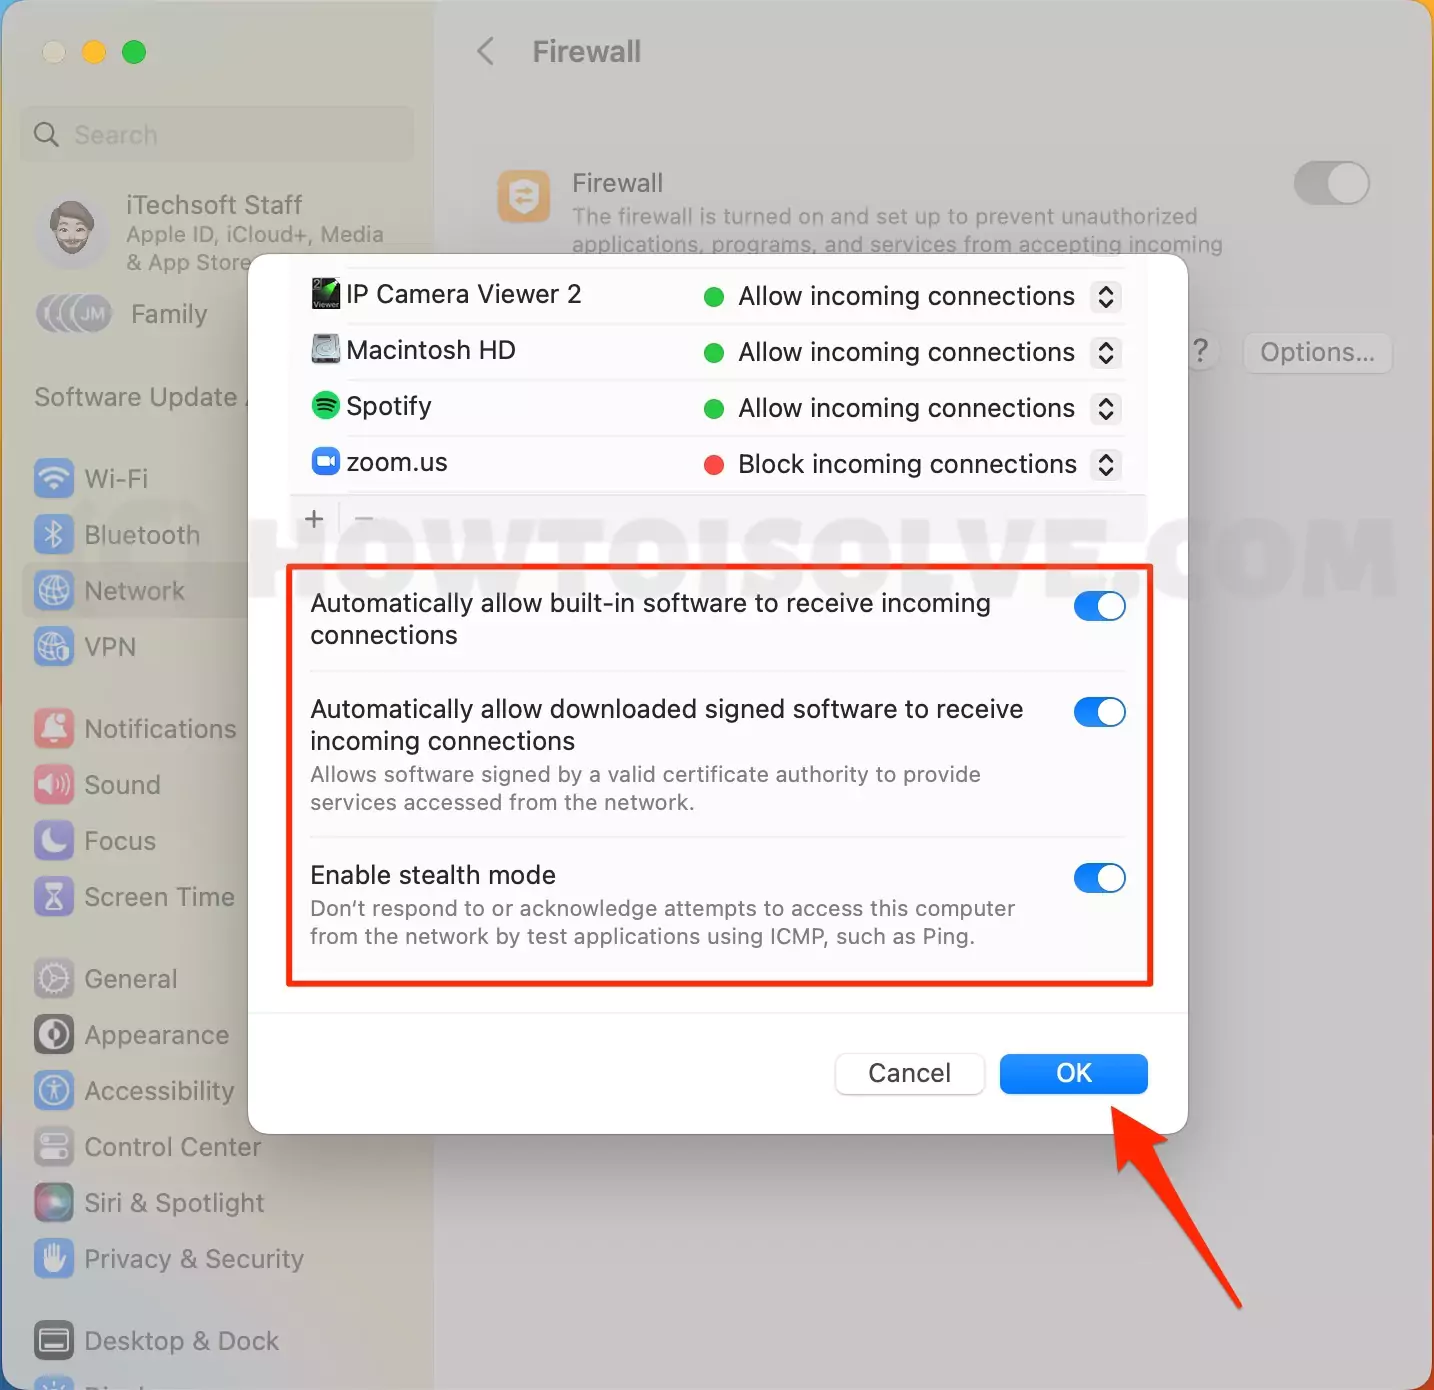
Step 2: Adjusting Firewall Settings
Next, you'll need to adjust your firewall settings to permit traffic through the necessary ports. You need to determine the ports that your remote access solution utilizes. If using SSH, you will likely need port 22 open. For remote desktop applications like VNC, you may need to open ports 5900 (for VNC) or 3389 (for RDP). In the firewall settings:
- Go to System Preferences (or System Settings) > Network > Firewall.
- Click "Firewall Options."
- Add rules to allow incoming connections on the required ports.
- Alternatively, you may need to disable the firewall altogether during the initial setup, but this is not recommended for security reasons.
Step 3: Configuring Port Forwarding (If Needed)
If your Mac server is behind a router, you may need to set up port forwarding. Port forwarding directs incoming network traffic from a specific port on your router to a specific device on your local network (i.e., your Mac server). The steps for port forwarding vary depending on your router model. The general process involves:
- Accessing your router's administration page (usually through a web browser using the router's IP address).
- Navigating to the port forwarding settings.
- Adding a rule to forward traffic on the required port to your Mac server's local IP address.
Step 4: Choosing a Remote Access Solution
There are various ways to access your IoT devices remotely. Some of the common solutions include:
- SSH: Secure Shell (SSH) is a network protocol that provides a secure channel over an unsecured network in a client-server architecture. It is commonly used to establish secure connections to remote devices.
- Remote Desktop Applications (VNC, RDP): These tools allow you to remotely view and control your Mac server's screen and associated devices. VNC (Virtual Network Computing) and RDP (Remote Desktop Protocol) are two popular examples.
- Web Applications: Developing a web app that runs on your IoT devices allows you to interact with them through a web browser.
The remote access solution you pick would decide the specific ports you need to open on your firewall.
Step 5: Ensuring Security
Security should always be a top priority. Here are some crucial security measures to take:
- Use Strong Passwords: Create strong, unique passwords for your Mac server and all your IoT devices.
- Enable Two-Factor Authentication (2FA): 2FA adds an extra layer of security, preventing unauthorized access even if your password is compromised.
- Keep Software Updated: Ensure that your macOS, all remote access software, and your IoT device firmware are always updated to the latest versions.
- Monitor Network Traffic: Use network monitoring tools to check for any suspicious activity or unauthorized access attempts.
- Limit User Access: Restrict the users who have remote access to your devices.
Step 6: Testing and Troubleshooting
Once you've completed the configuration, test your remote access to ensure everything is working correctly. Try connecting to your Mac server and accessing your IoT devices from a remote location. If you run into problems, consider the following troubleshooting steps:
- Check Firewall Rules: Make sure your firewall rules are correctly configured.
- Verify Port Forwarding: Ensure that port forwarding is correctly set up on your router.
- Confirm IP Addresses: Double-check that you're using the correct IP addresses for your Mac server and your IoT devices.
- Check for Connectivity: Use network diagnostic tools to check the connectivity between your devices.
- Consult Documentation: Refer to the documentation of your remote access solution for troubleshooting steps.
To further clarify, let's delve into an example of remotely accessing a Raspberry Pi behind a firewall using SSH. In this scenario, the Raspberry Pi serves as the IoT device, and you wish to access it remotely. The setup involves enabling SSH on the Raspberry Pi, configuring your Mac server for port forwarding (if required), and establishing a secure connection.
The steps involve:
- Enable SSH on Raspberry Pi: Use `sudo raspi-config` and enable SSH in the interface options.
- Configure Port Forwarding: Log in to your routers admin interface and forward port 22 (SSH) to the Raspberry Pis local IP address.
- Secure the Connection: Use strong passwords or set up SSH keys for enhanced security.
- Access from the Web Portal: Set up a web application on your Raspberry Pi to send commands and jobs or use a remote access solution to securely connect from a web browser, avoiding the need to discover the device IP or change firewall settings.
- Direct Connection: You can connect to your Raspberry Pi directly as if it were on the local network.
Here's how you can install a web application on an IoT device to remotely connect and control it using a web client:
- Set up a Web Server: Install a web server on the IoT device (e.g., using Apache or Nginx).
- Develop the Web Application: Create a web application (using HTML, CSS, and JavaScript) to control your IoT devices functionalities.
- Deploy the Application: Place your web application files in the web servers directory.
- Access via Web Client: Access the web application from any web browser.
Comprehensive Table for a deeper understanding:
Here's a table outlining the key differences and use-cases of different remote access methods:
| Method | Description | Pros | Cons | Use Cases |
|---|---|---|---|---|
| SSH (Secure Shell) | A secure network protocol for operating network services securely over an unsecured network. | Secure, command-line access, lightweight. | Requires command-line knowledge. | Remote server administration, transferring files. |
| Remote Desktop (VNC, RDP) | GUI-based remote access that allows you to view and control a remote computer's desktop. | User-friendly, visual interface. | Requires more bandwidth, potential security vulnerabilities. | Remote assistance, accessing desktop applications. |
| Web Applications | Access and control devices via a web browser. | Platform independent, easily accessible. | Requires web server setup, can be complex. | Remote device control, data monitoring. |