Are you ready to unlock the full potential of your Raspberry Pi, accessing it from anywhere in the world with ease? Remote access to your Raspberry Pi is not just convenient; it's a gateway to a world of possibilities, from headless operation to seamless file transfer, all at your fingertips.
The ability to remotely control a Raspberry Pi has become increasingly crucial in various applications, from home automation and embedded systems to educational projects and personal computing. Whether you're a seasoned tech enthusiast or a newcomer to the world of single-board computers, the capability to access your Pi's desktop, terminal, and files from another device is invaluable. The methods for achieving this remote access are varied, offering solutions for different needs and levels of technical expertise. You can choose from secure shell (SSH) for terminal access, Virtual Network Computing (VNC) for desktop sharing, or even utilize cloud-based services for enhanced security and ease of use.
Enabling remote access is often the first step, and several tools and services make this possible. RealVNC Connect, for instance, is a popular choice, offering a secure and user-friendly method for controlling your Raspberry Pi from a Windows, macOS, or Linux device. This removes the physical limitations of your Pi, allowing you to manage projects, transfer files, and monitor system properties remotely. Raspberry Pi Connect is another excellent option, providing a free screen-sharing and remote shell service. These tools are designed to be accessible to both beginners and seasoned professionals, ensuring that everyone can take advantage of the remote access capabilities of their Raspberry Pi.
Once you've decided on your access method, ensuring the security of your connection is paramount. Using a secure VNC connection with encryption is crucial, especially if you're accessing your Pi over the internet. This helps to protect your data from unauthorized access. While remote access is incredibly convenient, it introduces security risks if not properly configured. Therefore, it's essential to implement measures to safeguard your Pi and the data it handles. Understanding the risks and employing security best practices will ensure that your remote connection is as safe as it is useful.
Setting up a remote desktop connection to your Raspberry Pi via VNC typically involves several steps. You'll start by installing and configuring a VNC server on your Pi. This server will handle the sharing of your Pi's desktop screen. After installing the server, you'll need to enable VNC. If you are using a Raspberry Pi Zero W, for example, you will need to access the device's terminal, which can be done with the help of a USB cable. Once you have the VNC server up and running, you can then connect to your Raspberry Pi from another computer using a VNC client. RealVNC offers a free VNC viewer application for Windows, macOS, and Linux. You can also set up other remote access methods, such as SSH, and configure them to work with your local network or the internet. By learning these fundamentals, you are taking the first step towards mastering remote Raspberry Pi control.
There are two primary ways to establish remote desktop access to your Raspberry Pi using VNC Viewer: Through a direct connection or through a cloud connection. The choice depends on your specific needs and the security requirements of your setup. The direct connection is typically employed when both the Raspberry Pi and the client device are on the same local network. The cloud connection, on the other hand, uses a secure intermediary server to establish the connection, which is particularly useful when accessing the Pi over the internet. No matter the method, the objective is the same: to provide you with a seamless and secure way to control your Raspberry Pi remotely.
In this guide, we'll delve into the specifics of setting up remote access, focusing on practical steps and real-world scenarios. Whether you're using a Raspberry Pi 5 running Bookworm or an older model, you'll find valuable information to get your remote access configured and working smoothly. We'll look into troubleshooting common issues, like black screens or lag, so you can handle any difficulties that come your way. Through step-by-step instructions and expert advice, we'll make sure you have the knowledge to set up remote access to your Raspberry Pi with confidence.
For those new to the world of Raspberry Pi, starting with the basics is always the best approach. The initial setup involves installing the Raspberry Pi OS via the Raspberry Pi Imager. Once the operating system is installed, you can proceed with setting up your remote access method of choice. For those who are experienced, you might already have an existing OS installation and be familiar with the command line interface (CLI). The setup process is mostly similar, but knowing your way around the terminal will always make things easier.
If you encounter any issues, such as compatibility problems or slow performance, don't worry. Various solutions are at your disposal. For example, certain VNC clients might not be compatible with the default authentication protocol of the RealVNC server bundled with Raspberry Pi OS. In such cases, you might need to configure the client to use a specific encryption or encoding method. You can also experiment with different settings to optimize the performance of your remote connection. By being prepared to troubleshoot, you'll ensure a smooth and satisfying remote access experience.
When accessing the Raspberry Pi remotely, it's not only about viewing the desktop screen. Transferring files is also an essential part of the process. RealVNC Viewer on Windows, macOS, and Linux allows you to transfer files between your computer and the Raspberry Pi. This functionality enables easy management of your files, allowing you to back up important documents or exchange data for ongoing projects. The ability to copy and paste files makes the remote experience even smoother, providing maximum efficiency.
Connecting via a mobile VNC client is also a valuable aspect of the remote access capabilities. Many apps, such as VNC Viewer by RealVNC, are available for both iOS and Android, allowing you to access your Raspberry Pi from your smartphone or tablet. This gives you the ultimate in remote control, allowing you to manage your Raspberry Pi from anywhere. With the ability to connect using your phone, you gain a degree of freedom that can prove to be invaluable.
Raspberry Pi Connect offers a simplified and secure method for remote screen sharing. This service eliminates the need to manually determine your local IP address, and instead, allows you to access your Raspberry Pi seamlessly through a web browser. This streamlined approach simplifies the setup process and is especially convenient for users who want a straightforward remote access solution. Raspberry Pi Connect is perfect for users who want a quick and easy way to access their device.
Sharing files between devices is also a crucial feature of remote access. Local network services, such as NFS (Network File System), SCP (Secure Copy Protocol), Samba, and Rsync, allow you to share files between devices on your local network. By setting up these services, you can access and manage your files easily without directly controlling the Raspberry Pi itself. This makes it easy to share files with other devices on your network, regardless of their location.
A frequently asked question is: "How does the underlying technology work?" To answer this, we can look at the explanation provided by Paul Mucur, who runs web development at Raspberry Pi. In short, the basic technology involves VNC, which allows a computer's desktop to be viewed on the display of a different computer. While for most users, the computers are in the same building and on the same network, more advanced configurations are possible.
Since the release of the first Raspberry Pi in 2012, VNC has been a popular choice for desktop sharing. However, with the evolution of the Raspberry Pi ecosystem, several options have emerged to enhance security and user experience. Raspberry Pi Connect is an excellent example. It is a new service by Raspberry Pi to securely remotely access your Raspberry Pi from anywhere using a web browser. For users with Raspberry Pi 4 or newer models running the latest version of Raspberry Pi OS, the Raspberry Pi Connect package is pre-installed, simplifying the setup process. However, if you have an older Pi, you can download the package using the apt package manager.
In order to remotely control your Raspberry Pi from any device connected to the internet, consider these options: expose SSH or VNC on your Raspberry Pi over the open internet, within a VPN, or by using an external service like RealVNC's cloud VNC viewer. Alternatively, you can use Raspberry Pi Connect, a free screen-sharing and remote shell service provided by Raspberry Pi. These services provide different levels of security and complexity, allowing you to pick the most fitting one for your needs.
To connect to your Raspberry Pi from another machine using SSH or VNC, it is essential to know your Raspberry Pi's IP address. This is an easy task if you have a display connected to the Raspberry Pi. But it can be obtained remotely from another machine on the network via several methods. If you are using RealVNC, you might need to set the encryption to 'None' and/or encoding to 'Raw'. Also, make sure you select the correct VNC server within the configuration menu if the server provides this feature.
Many users have had the experience of successfully connecting to their Raspberry Pi using VNC. For example, by following solutions found online, you can get RDP working and then use VNC without any issues. This might involve installing RDP first, as it seems that this configuration can resolve some problems with VNC. Moreover, if you use a mobile VNC client on your smartphone, connecting to your Raspberry Pi is easy and straightforward. By following these methods, you will be able to set up a remote connection to your Raspberry Pi from any device.
To install and configure Connect on the Raspberry Pi OS desktop, you will need to follow these simple steps. If you don't already have a working OS installation, start by installing the Raspberry Pi OS via the Raspberry Pi Imager. Once the OS is ready, you can configure Raspberry Pi Connect. By following these steps, you'll be one step closer to a seamless remote experience.
VNC on Raspberry Pi
This guide covers setting up and using VNC (Virtual Network Computing) on a Raspberry Pi for remote access. It is perfect for beginners and hobbyists who want to learn how to access their Raspberry Pi remotely from another device, such as a computer, tablet, or smartphone.
The core concept behind VNC is simple: It allows you to see and control your Raspberry Pi's desktop from a different screen.
Whether you're managing projects, transferring files, or monitoring system properties, VNC provides a versatile solution, enabling you to connect to your Raspberry Pi from anywhere.
Here are the key benefits of using VNC for remote access on a Raspberry Pi:
- Accessibility: Access your Raspberry Pi from any device with a VNC client (Windows, macOS, Linux, iOS, Android).
- Simplicity: Easy to set up and use, making it ideal for beginners.
- Versatility: Manage projects, transfer files, and monitor your system remotely.
- Security: Secure connections with encryption, especially when using RealVNC.
Setting up VNC on Raspberry Pi
The following steps will guide you through setting up a VNC server on your Raspberry Pi.
Step 1: Access the Terminal
- If you're already using a graphical desktop on your Raspberry Pi, open a terminal window.
- If you're headless (no monitor), you can access the terminal via SSH (Secure Shell).
- Connect to your Raspberry Pi over the local network or public internet.
Step 2: Update Your System
Before you begin, it's essential to update your Raspberry Pi's packages. Run the following commands in the terminal:
sudo apt updatesudo apt upgrade
Step 3: Install a VNC Server
There are several VNC server options available. RealVNC is often pre-installed, but we'll cover how to install it as well.
sudo apt install realvnc-vnc-server
If RealVNC is not your preference, you can install alternatives like TightVNC, which may require specific configuration for optimal results.
sudo apt install tightvncserver
Step 4: Configure RealVNC (Recommended)
If you're using RealVNC, you can enable it through the Raspberry Pi configuration tool.
sudo raspi-config
Navigate to "Interface Options" > "VNC" and enable it.
RealVNC offers a cloud connection option, which provides a secure and simple way to access your Raspberry Pi from anywhere.
Step 5: Configure TightVNC (Alternative)
If you're using TightVNC, you'll need to start the VNC server and set a password.
vncserver
You will be prompted to set a password for VNC access.
vncserver -geometry 1024x768
This example starts VNC on the first display (":1") with a resolution of 1024x768. The ":1" means the server is running on display number 1.
Step 6: Find Your Raspberry Pi's IP Address
To connect to your Raspberry Pi, you need its IP address.
hostname -I
This command displays the IP address of your Raspberry Pi on the network.
Step 7: Connect Using a VNC Client
Download and install a VNC client on your computer or mobile device. RealVNC Viewer is a good choice.
Open the VNC client and enter your Raspberry Pi's IP address, followed by the display number (if applicable). For example:
192.168.1.100:1
Enter your VNC password when prompted.
Troubleshooting Common Issues:
- Black Screen: Check your VNC server configuration and ensure the display number is correct.
- Lag: Adjust the VNC client's quality settings. Lower the color depth and use a less bandwidth-intensive encoding method.
- Authentication Issues: Double-check your VNC password and ensure your VNC server is properly enabled.
- Network Problems: Verify your Raspberry Pi is connected to the network, and that your firewall doesn't block VNC.
Advanced Configurations and Security
For enhanced security and functionality, consider these advanced configurations.
1. Secure Connections with SSH Tunneling:
Create a secure connection using SSH to forward VNC traffic. This encrypts the data transmitted between your Raspberry Pi and the client device.
From the terminal of your computer, run this command:
ssh -L 5900:localhost:5900 pi@your_raspberry_pi_ip_address
ssh: Initiate the SSH connection.-L 5900:localhost:5900: Creates a local port forward.pi@your_raspberry_pi_ip_address: Your Raspberry Pi username and IP address.
In your VNC client, connect to localhost:5900.
2. Using a VPN (Virtual Private Network):
A VPN provides an extra layer of security by encrypting all internet traffic between your device and the VPN server.
- Install and configure a VPN client on your Raspberry Pi.
- Connect to your VPN.
- Access your Raspberry Pi via its local IP address within the VPN network.
3. Cloud VNC Connect:
RealVNC offers a cloud-based service that securely connects your Raspberry Pi without needing to configure port forwarding or dynamic DNS.
- Sign up for a RealVNC account.
- Install RealVNC server on your Raspberry Pi and log in to your account.
- Connect to your Raspberry Pi from any device by logging into your RealVNC account.
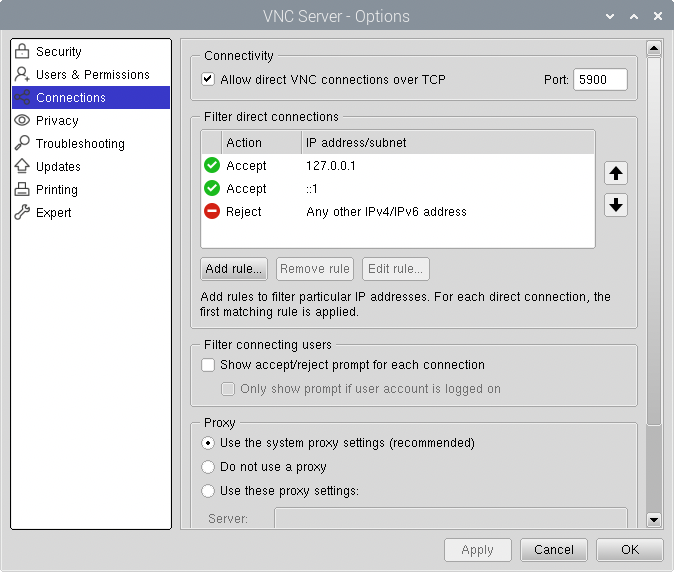
4. Firewall Configuration:
If you use a firewall, ensure that it allows traffic on the VNC port (typically 5900).
- Configure your firewall to allow incoming connections on port 5900 (or the port youve configured).
File Transferring with RealVNC
RealVNC Viewer enables you to transfer files between your computer and your Raspberry Pi easily. Follow these steps:
- Connect to your Raspberry Pi using RealVNC Viewer.
- Look for the toolbar button in the RealVNC Viewer application.
- Click the button to open the file transfer dialog, and follow the on-screen instructions.
Mobile VNC Client setup
Mobile VNC Clients are a great way to remotely control your Raspberry Pi from your phone or tablet.
Here's how to connect using a mobile VNC client:
- Install a VNC viewer app on your phone (e.g., RealVNC Viewer).
- Open the VNC app and tap the plus (+) icon to add a new connection.
- Enter your Raspberry Pi's IP address, followed by a colon and the display number (e.g., 192.168.1.100:1).
- Enter your VNC password when prompted.
- Connect to your Raspberry Pi.
These steps will have you set up with VNC remote access in no time.
Using SSH for remote access
SSH (Secure Shell) is a secure network protocol that provides a way to access the Raspberry Pi's terminal remotely.
Here's a summary of the key steps:
- Enable SSH: Ensure SSH is enabled on your Raspberry Pi. You can do this through the Raspberry Pi configuration tool (
sudo raspi-config) or by creating an SSH file on the boot partition. - Find the IP address: Determine your Raspberry Pi's IP address (e.g., using
hostname -I). - Connect via SSH: Open a terminal on your computer (Windows: PuTTY or WSL; macOS/Linux: built-in terminal) and run the command:
ssh pi@your_raspberry_pi_ip_address - Enter password: Enter your Raspberry Pi password when prompted.
File Sharing and Data Transfer
Here are some methods to share files and data between devices connected to your Raspberry Pi:
- NFS (Network File System): NFS allows you to share directories over a network, making them accessible as if they were local to the connecting machine.
- SCP (Secure Copy Protocol): SCP is a secure way to copy files to and from your Raspberry Pi using an SSH connection, ensuring the data is encrypted during transfer.
- Samba: Samba enables file sharing between Raspberry Pi and Windows machines or other systems that support the SMB/CIFS protocol.
- Rsync: Rsync is a versatile tool for file synchronization, efficiently transferring only the differences between files, which is very useful for backups and keeping files updated.
Conclusion
With these steps, you're well-equipped to establish secure and convenient remote access to your Raspberry Pi, whether you choose VNC, SSH, or cloud-based services.
Embrace these powerful features to expand the capabilities of your Raspberry Pi, opening doors to exciting new projects and seamless control from anywhere.